My first weekend here turned out to be a good one. Friday night after class the whole dorm went to a lean-to in the woods at the back of the farm. We had a nice warm fire going and hung out for quite a while. As I was leaving I heard a very close, very loud pack of coyotes howling at god knows what.
On saturday morning I went to a farmer's market on Craftsbury Common and bought a couple pieces of organic handmade soap. One is infused with balsam and the other with tea tree. They smell pretty good. Saturday night I went to Zach's house to watch the Bruins game. Zach is about my age and served in the Israeli Army a while back. The house is an immaculate log cabin owned by his parents. They had it built to their specs as a retirement home. The interior is completely covered in tongue and groove pine and looks beautiful. The best feature though is the great room that has a high skylighted ceiling and huge windows that go from ceiling to floor revealing a stunning mountain view. Pretty awesome.
On sunday I spent most of the day at John Smo's campsite. Rather than live in the dorm Smo decided to set up a tent and live outside for the semester. He was sleeping in a hammock in the swamp but recently moved to a tent platform across the field from the dorm. We spent the afternoon gaining and losing various people as they came and went, coloring with crayons, throwing hatchets, imitating bird calls, discussing and learning knots and hitches, carving walking sticks, and listening to a great independent radio program based in VT. The dial setting is 107.9 and every sunday from 1 to 4pm a fellow plays some really good, rare and diverse music. Yesterdays show included folk, bluegrass, celtic, mariachi, reggae and old swampy blues music. I'm already looking forward to next week's show.
Smo's Campsite
Smo's homemade blacksmith forge (he drove down the road with a fire going)
If you're looking to make a durable, appealing, functional basket, look no further than the black ash tree. The Black Ash (Fraxinus nigra), also called the basket tree, is the northern-most native ash. It is found in the wet soils of cold swamps and peat bogs where drainage is poor, and at the boundries of coniferous and hardwood forests. Because of its habitat it is rare to encounter a black ash that reaches over 1 foot in diameter. The top of the tree will often appear to be "half-sick" with a sort of halloweenish silohette. The strong thick branches of the tree are found in a crown at the top with an abscence of small twigs. The leaflets are bunched in groups of 7-11 and are opposite each other and attach directly (no leaf stalk) to a central 12-16" lead stem. Individual leaves are broad and lance-shaped with finely serrated edges.
Example of Black Ash Leaves
The bark is distinctive and resembles that of an elm. It is gray in color, corky in nature, and fissures into soft scaly parts. When selecting a tree look for the straightest one you can find that provides a log at least 8 or 10" thick and 10-12 feet long. Stuart Soboleski, Sterling's farm manager, cut us a nice black ash prior to our class and brought along his friend and mentor, master basket maker Irene Ames to teach us the splint harvesting technique. We carried two good sized log sections from the cedar swamp to our work space. You'll want to harvest the splints soon after cutting the tree as you will need the wood to be moist and pliable. If the tree dries out between cutting and working it you can soak it in a body of water or a trough. Note the bark coloring and pattern.
The next step is to remove the bark from the tree. Use a knife or fingers to break away a piece of the spongy outer bark. As long as it is still wet you should be able to work your hands underneath the bark and peel it off in one piece or nearly so. If not, use a draw knife to remove the bark.
After removing the bark, prop one or both ends of the tree up on a notched log to keep it off the ground and prevent it from rolling around. Use an iron or wooden mallet or 2-3 pound short handled sludge hammer to pound the log down its length. This will crush the connecting fibers between growth rings allowing them to peel off in strips to use as weaving material and uprights for your basket. Propping the log up ensures that the log absorbs most of the impact, not the ground. You will need to hit the log with signifigant force but do not hit so hard that you fissure the wood. Allow the weight of the mallet to do most of the work. For ease in splinting make sure you overlap your blows several times, perhaps as many as 16 times per square inch for the top layer. The hits will send shock waves through the entire log helping to loosen some lower layers as well. Native Americans coated the log with mud to show where their pounding stopped as well as to prevent the log from drying out.
After you pound out a few lenghts of the log, make two cuts a few inches apart at one end of the log into the growth ring of the surface layer. Work the knife blade underneath the ring from the end to pry a piece up and start your splint. You should then be able to take a knife and work it underneath the growth ring, prying and cutting if necessary with one hand while pulling and wiggling with the other, and a splint of wood should come free in one long strip. If the splint starts to stick to the layer underneath it continue to pound the area with your mallet then try again until it comes free. The outer most layers are new growth rings and will still be somewhat spongy and stuck together so they will likely not be of much use. Working through these first couple layers is key to getting down to the strong supple inner layers. Once you begin to see rings of a uniform darker brown you have hit paydirt. Remove these layers in approximately 2" wide strips and set aside for further refinement. As you get down to the heartwood you will probably start to notice more knots that will break up the length of the splints. There will still be workable material between these knots but eventually as you get closer to the center you will come to a point where it is no longer worth the trouble.
After you harvest several workable splints that are the length of the tree you can begin to shave off some of the cambium that may be stuck to the splint by using a knife and a leather gaurd patch.
After cleaning your splints you may want to split some of them into thinner thicknesses depending on your plans for weaving. Some thicker splints can be saved for uprights and handles but thinner pieces are ideal for weaving and will remain extremely strong. Using a knife, cut halfway through the end of your splint about an inch from the top. You should be able to fold over a tab so that you now have two sides at the tip of the splint in a V shape. Next you will need the splitting device seen below. It is simple and cheap to make on your own or you can do the next step by hand. Feed the V end of the splint through the hole in the side of one of the splitting device legs. Bring it up through the mouth of the device and compress the two legs with your knees. Keep the tips of the legs even and pull each side of the splint away from the middle with slow, consistent force. You should see the splint begin to split into two thinner splints. If one side begins to get thinner than the other add more pressure with your knee to the thin side to raise the thin side leg above the other leg and even out the splint.
Once you have your splint at the desired thickness you can change the width by using a straight edge to rip the wood by drawing a blade down the length of the splint. Depending on your basket, about a 1/2" to 1/4" width may be ideal for weavers, and a 1" to 3/4" width for uprights. Below are two examples of unfinished splints in varying thickness and width. The splints are rolled for storage and should be soaked prior to weaving or reworking to make them more supple.
Thank you to Stuart Soboleski for helping with this project and thank you to Irene Ames for dedicating your time, knowledge, and skill to teaching us this craft. For more information on Black/Brown Ash Basketry visit Irene's website at http://www.imabasket.com/. Stay tuned for next week when we cover the weaving and finishing technique for creating beautiful, long lasting baskets.
Identification/Preparation/Historical Info from:
McGuire, John E. Old New England Splint Baskets and how to make them. Schiffer Publishing, Ltd: Westchester, PA 1985.
Today was a pretty good day. I had an Intro to Grazing Class at 6:15am. I must be getting on farmer's hours because I woke up before my alarm clock for the 5th time this week. We covered livestock pasture grazing disadvantages when compared to confinement feeding on grain. Some of them include: you don't get to ride a loud expensive fuel-sucking tractor anymore, you only get to experience the joy of cleaning out a barn for half the year, no more recreational manure spreading because the animals do it on their own, you don't get to buy new livestock every 5 years like you do with confinement feeding, etc. So really the lesson is better titled as "grazing advantages." One thing to remember: the first day of paddock feedding is in the kitchen, the second day is in the bedroom, and the third day is in the bathroom... Rotate! Rotating is exactly what we did this morning by setting up portable electric fencing in a new spot and moving 4 heffers from one pasture to a fresh one. The process involves a combination of luring the animals with a grain bucket, using a "yum, yum" call, blocking their path to adjacent pastures, and tugging them along with a rope. It went fairly smooth. Here is our farm manager Stuart leading the animals along while we block their retreat from behind.
Next I had a tractor lab. We covered the Japanese made Kubota, a diesel 50 horse power combination front end loader/tractor. It is owned by the school and is fairly new so it has simple controls and works great. Mark Dunbar who teaches the course is wearing the denim jacket and his son John is in the yellow shirt.
The end of the day I had Livestock Systems. We took soil and pasture samples and did some pasture plant identification. On the way back from class I saw 4 of the 5 common modes of northern VT summer transport in one place: walking, pickup truck, horse-drawn buggy, and tractor. The only thing missing is a bicycle.
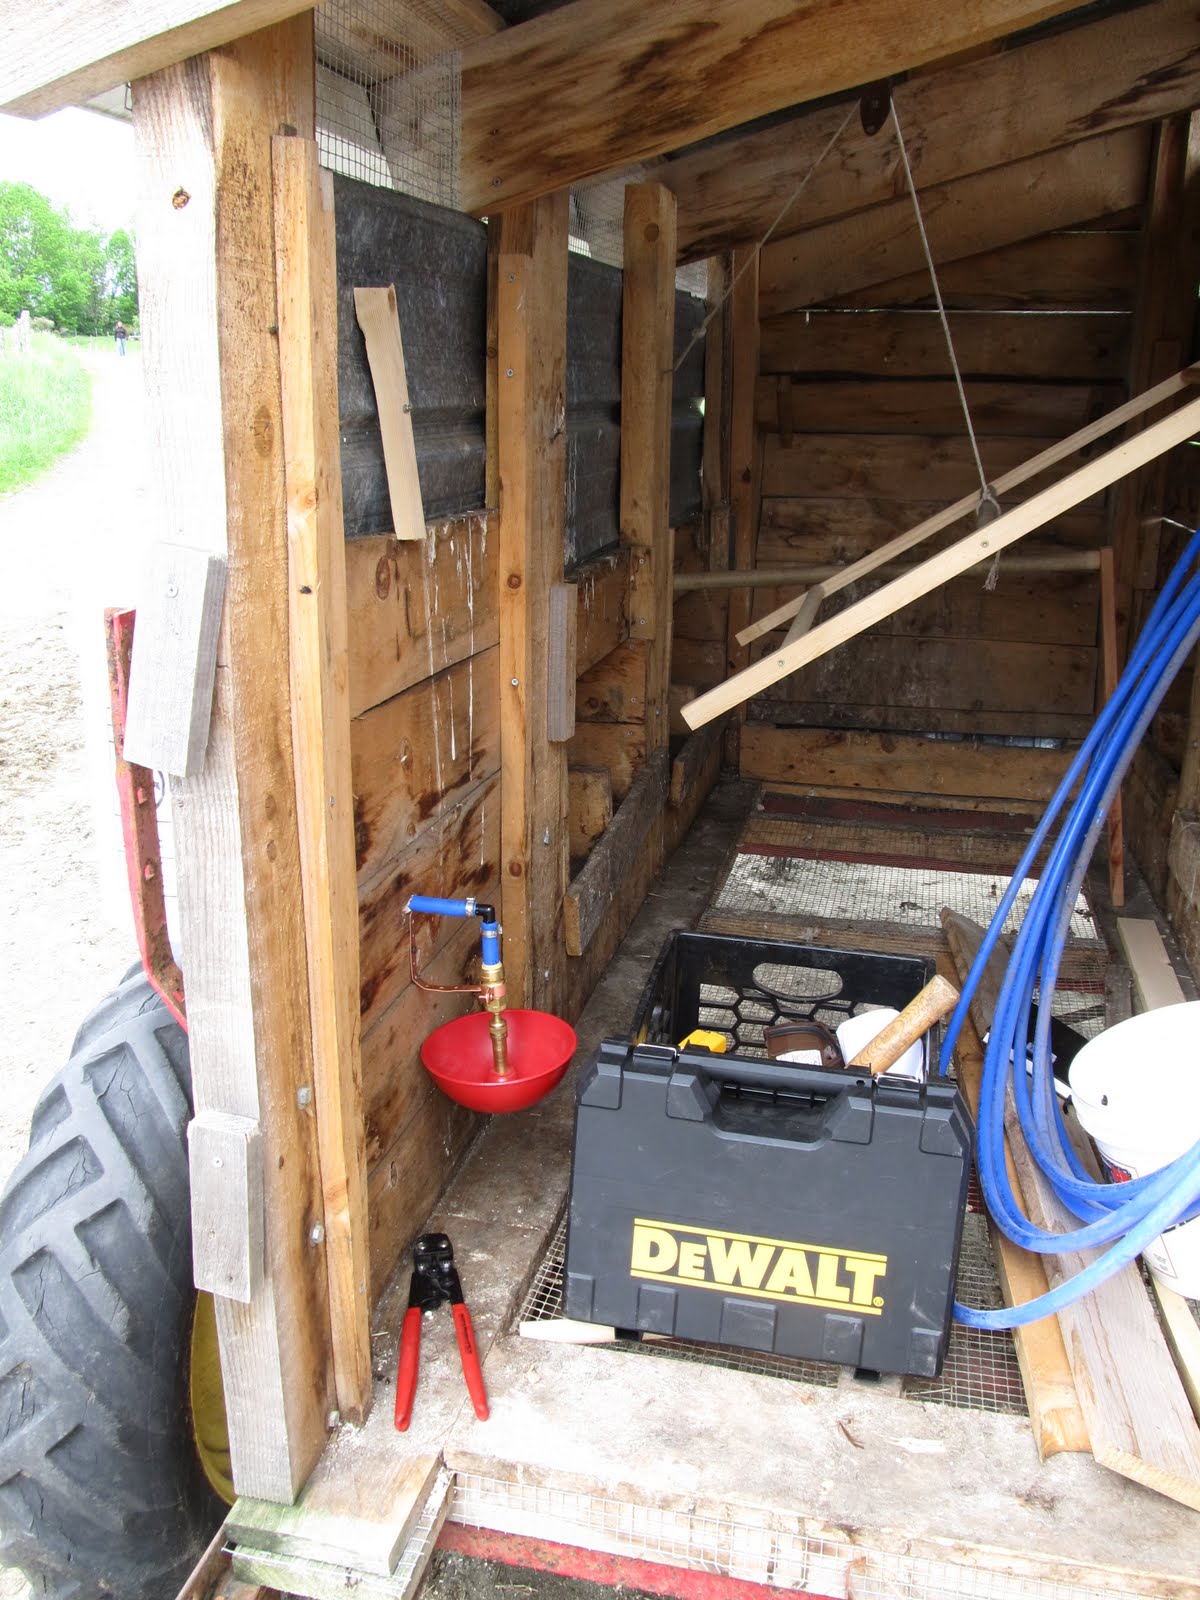
Today I worked as a farm hand again. My first project was to rig a watering system for the mobile egg laying unit. I attached a gutter under the roof, connected a pex tube from the gutter to a collection bucket hung on the outside wall, and fed a tube into the chicken area where a little fountain was connected. Pretty simple! As long as we keep getting rain we shouldn't have to carry anymore water buckets out there this summer.
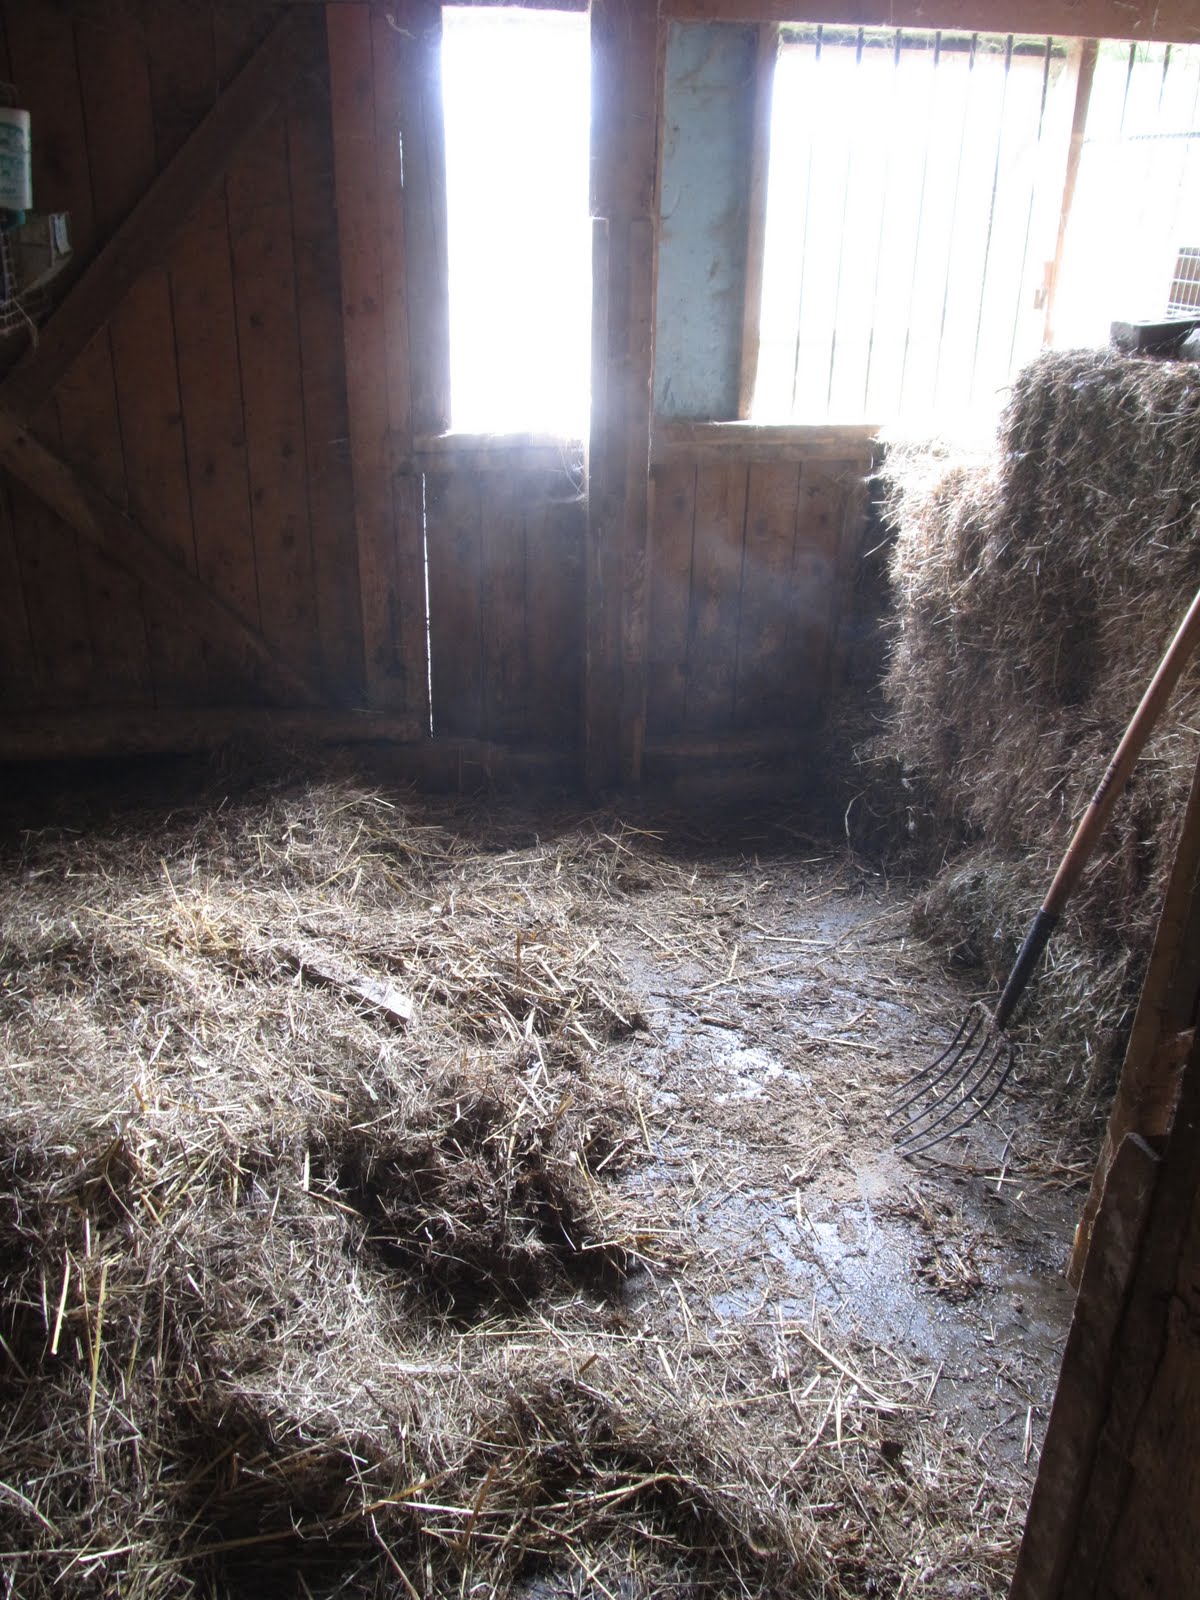
My next project was "mucking." This involves cleaning the layers of hay, dung and urine out of the animal pens using a pitchfork and shovel and wheelbarrowing the heaps over to the compost pile. It was strangely statisfying.
“An exploiter wishes to earn as much as possible by as little work as possible. The nurturer expects to have a decent living from his land but his characteristic wish is to work as well as possible.” - Wendell Berry
Had another 6:15 am'er for my Intro to Grazing class. Amazingly I woke up before my alarm again. We took soil samples of tilled land and pasture and noted the differences between composition and aggregate and what signs to look for that indicate healthy, fertile soil. We also used a "grazing stick" which attempts to measure the height and density of pasture grass in order to calculate the amount of dry feed weight in a given area.
Next was a new class called Livestock Systems. We got put into groups to work on a project planning out a farm with animals of our choice that is due at the end of the semester. We have to take into account soil conditions and management strategies, pasture plant species, fence and watering choices, grazing plan, infastructure (summer and winter housing), and compost and manure handling. It will be challenging. A good resource we looked at is http//websoilsurvey.nrcs.usda.gov/app/WebSoilSurvey.aspx. It lets you look up almost any piece of land in the US and get an assessment of it's agricultural uses and other resources.
In the afternoon I drove to Willie's in Greensboro to pick up a straw hat (remedy the sun burning) and some work gloves (remedy the sliced up hands from thorny brush clearing). After that I went back to Mark Dunbar's farm for an individual tractor lab. His farm has been in his family since the late 1700's and has morphed from producing grain to beef cattle to chickens pigs and corn and now has been a dairy farm for the past few decades. He has about 100 dairy cows, mostly Jerseys. The plan was to hook up a seldom used hay tedder to the old Ferguson and test her out. Lesson 1 is that things don't always go as planned. The drive shaft that connects from the tedder to the tractor was bent and would not couple. We drove up the road to handy Tim the mechanic to give her a look. First he tried straightening it with a 20 ton jack press. That failed when it slipped out. Next he stuck it in a vice, hit it with a torch, and bent it straight using a smaller pipe that he put inside. Good as new! We got back and hooked it up (causing me to notice that a tedder is something I never want to get in the way of) only to realize we had two flat tires on the tedder. We were able to fill up one but the other wouldn't hold air (dry rot). Done for the day we were.
morning: Went to Mark Dunbar's farm on Ketchum Hill Rd and learned how to drive two different types of tractors, one small gasoline powered tractor made in England in the 1950's (Ferguson) and one larger diesel powered tractor made in Germany in the 1970's (John Deere). The hardest part is definitely backing up with a trailer attached but I managed to more or less master it after several attempts.
afternoon: worked 3 hours as a "farm hand" clearing thorny brush for a new fence line, sanding eggs so they will be clean for the dining hall, and shoveling dung
evening: slaughtered, defeathered and cleaned a fat white chicken to be served in the dining hall
fun stuff! Very tired and sun kissed, hands completely sliced up
Today (Sunday May 29th) was the first day of a month long Sustainable Agriculture program at Sterling College, in Craftsbury Common VT. Being that the school is the smallest 4 year college in the country, along with my short haircut making me stick out like a sore thumb, it didn't take long for everyone to learn my name (students and faculty alike). I think there's about 50 people here total. It's gonna take me a bit longer to learn their names.
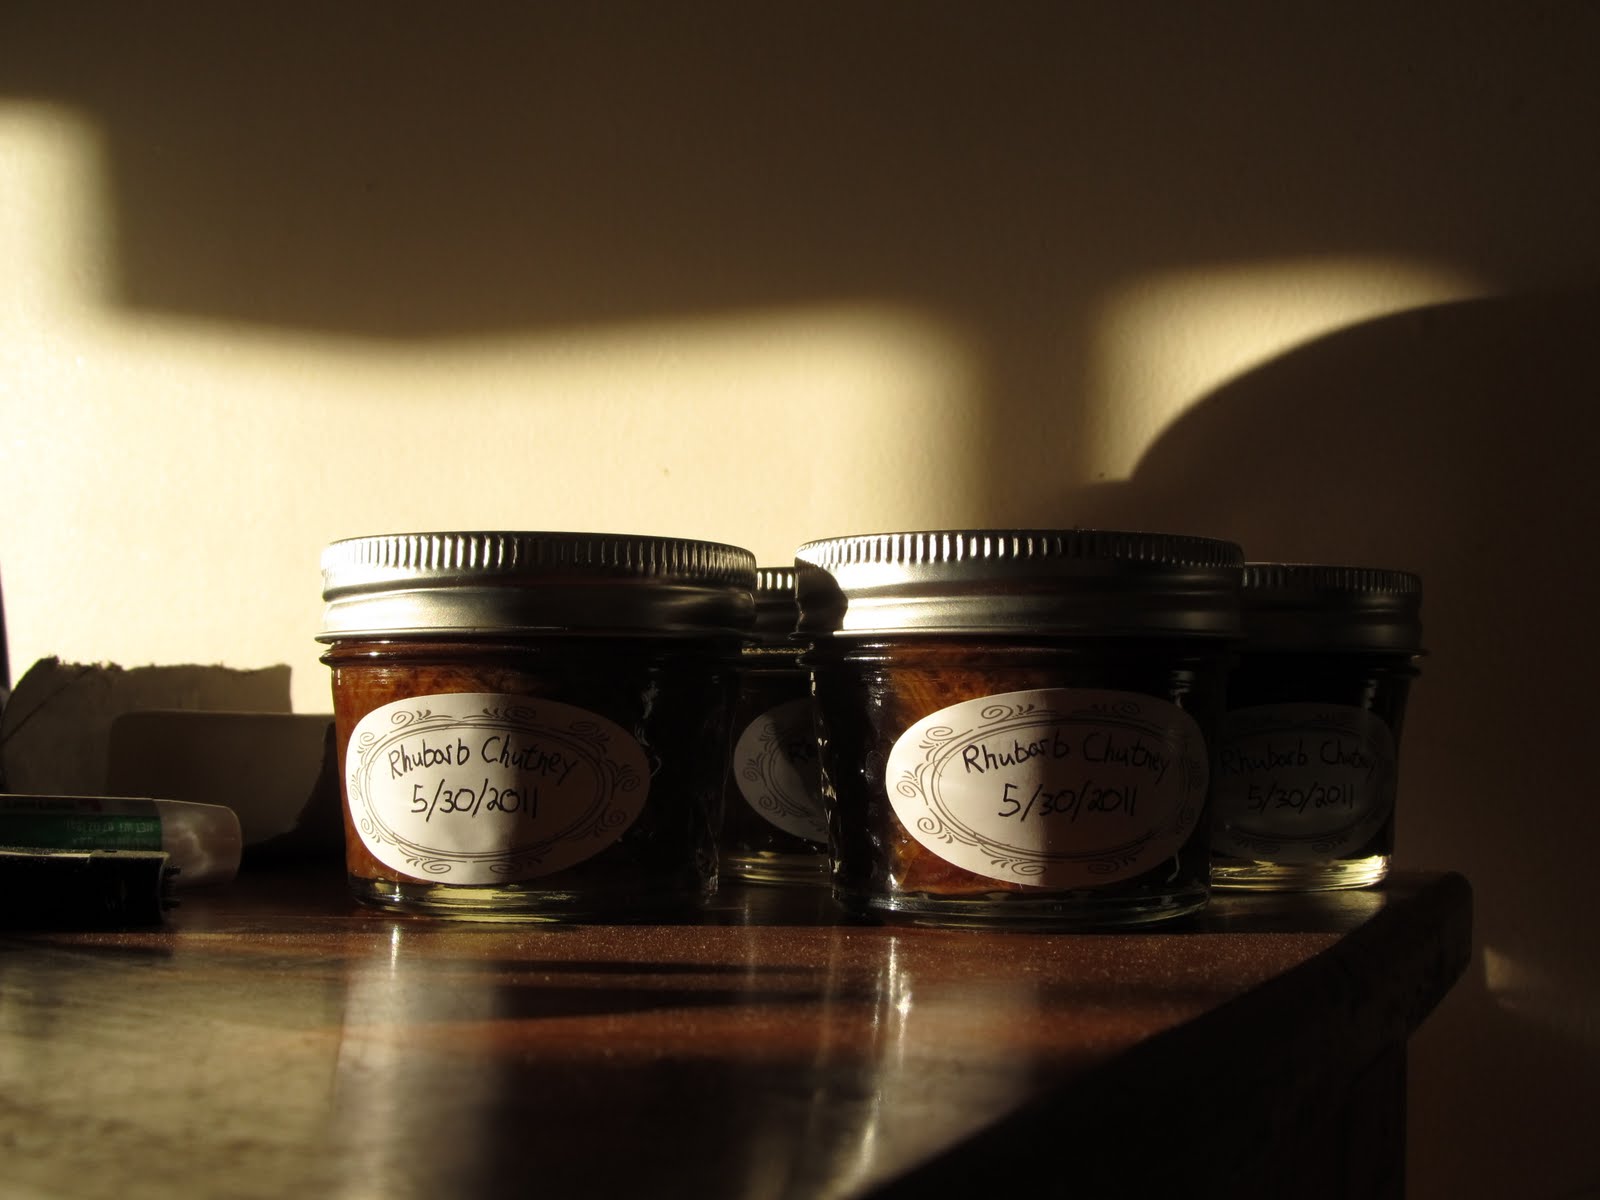
For the first two weeks I will be in Hamilton dorm (1st pic below). I have a roommate named Richie who is from Jersey and is almost done with an Ecology degree. He has only 1 class this semester (I have 5) so he is pretty laid back. The rooms are "rustic" as in pretty basic, but they will do just fine. It's suprising how hot northern VT can get in May, especially when your dorm has no a/c, no fans, and no screens on the windows. Monday morning (May 30th) I somehow woke up before my alarm and made it on time to my 6:15am class called Intro to Grazing. We learned about mob stocking (grazing animals as a herd) and grazing rotation, i.e. moving animals from one fenced paddock to another while cycling horses, sheep, goats and pigs (which all feed at different levels) to keep the pasture healthy and avoid over-grazing (which causes bare infertile soil, eroision, etc). Next was a class on farm planning called Whole Farm Thinking. We covered the basic considerations put into growing crops and raising livestock all the way to harvest and processing. In the afternoon I had Farmstead Arts. We made rhubarb chutney and learned how to can it in jars using the hot water bath technique. It is delicious! The food here is 1000 times better than a supermarket, mainly because it is prepared in small batches and most of it is organic and grown on the college farm. Fresh eggs, vegetables, pork, chicken, turkey, herbs, and beef all make their way from the college farm into the dining hall with amazing results. Milk comes from a nearby organic dairy farm. So, everything is going great.
Here is how to make the Rhubarb Chutney! Ingredients and Supplies
- 4 lbs rhubarb (mix green and red) - 2 lbs red onions - 3 cups white sugar - 1 cup molasses - 2 cups cider vinegar - 2 Tbsp cinnamon - 1/2 Tbsp cloves - 2 Tbsp salt - 1 Tbsp ginger - 2 large pots - ladle - 10 to 12 1/2 pint jars - canning tools (funnel, magnetic stick, jar tongs, settling tool) Directions
Chop rhubarb into 1/2" pieces. Mince onion. Combine with rest of ingredients in separate pot and stir. Place pot onto medium high heat. Cover pot, boil and stir until thick, about 45 minutes. To reduce liquid content, remove cover when necessary. Towards the end of cooking time place empty jars, lids and tightening bands into a pot of water to boil for sterilization. When the Chutney is done, remove a jar from the boiling water using the jar tongs. Place funnel in jar and ladle in some Chutney leaving a 1/4" of headspace. Use the settling tool to agitate the Chutney and remove any air pockets if necessary. Use magnetic stick to retrieve a lid by picking it up on the top side and placing it onto the jar. This ensures you do not contaminate the inside of the jar or the underside of the lid. Retrieve a tightening band and screw onto jar just barely hand tight (this allows air to escape). Repeat process for all jars. Place covered jars into water and boil for 10 minutes. The air inside the jar will heat, forcing it out, and the chutney will continue to cook some. Remove jars from water using jar tongs. You should hear a distinct pop shortly after the jar hits room temperature air. This is the lid sealing onto the jar. The tightening band can be removed or left on. Jarred chutney will keep indefinitely! Eat the remainder of the chutney on a piece of Cabot cheddar cheese and store the jars in your bunker for the apocalypse.